Skip to content
Latch & Hub

Systems · Security Systems

How to Install a Home Security System Yourself

A modern DIY alarm is genuinely a two-hour job with no tools beyond a screwdriver and a tape measure. What takes the other hour is the part the instructions skip: deciding where everything goes before you peel a single adhesive pad, because every sensor you reposition later leaves a mark.

By Stephen V.Updated How we choose
#ad

We earn a commission when you buy through our Amazon links, at no extra cost to you. It never changes our rankings — where the subscription-free or cheaper option is the better buy, we say so. How this works.

Verdict

The bottom line

Installing a DIY home security system takes about two hours and needs a screwdriver, a tape measure and a pencil. Do it in this order and nothing has to be redone: plan the layout on paper first, place the base station centrally and out of sight near your router but not beside it, mount the keypad inside the door you actually use, fit contact sensorson every ground-floor door and accessible window with the two halves within the maker's published alignment gap, put motion sensors in interior choke points rather than bedrooms, then test every sensor twice — once in test mode and once armed. For a first system the Ring Alarm 8-Piece Kit is the easiest to install and expand, the eufy Alarm 5-Piece Kit with HomeBase 3 arrives pre-configured and has no monitoring plan to decide about, and the Ring Alarm Pro only makes sense if you were going to replace your router anyway. Before you activate monitoring, check whether your municipality requires an alarm permit.

The hardware half of a DIY alarm install is close to trivial — the sensors are adhesive, the pairing is a QR code, and the base station plugs in. Almost everything that goes wrong is a decision rather than a step: a sensor stuck where it catches the door frame, a motion detector aimed at a radiator, a base station in a closet where it cannot reach the far bedroom, a keypad by the front door you never use. Here is the order that avoids all of it.

Step one: plan it on paper before you unbox anything

Sketch the floor plan — a rough rectangle per room is fine — and mark three things: every exterior door, every window a person could get through from ground level (including above a flat roof, a garage roof or a sturdy fence), and the routes between floors or between wings. Those marks are your sensor list.

Then apply the layering principle: contact sensors on the perimeter, motion sensors in the interior choke points an intruder cannot avoid, and a camera only where you need to identify someone rather than just detect them. A kit with eight pieces does not mean eight sensors spread evenly around the house — it means covering the three or four genuine entry points properly and putting the rest where someone already inside has to walk. How to choose a home security system covers sizing the kit to the house, and how home security sensors work explains why the layering works the way it does.

Step two: site the base station

The base station is the brain, the siren and the radio, and it has four requirements that pull against each other. It needs to be reasonably central, because every sensor talks to it directly and the furthest sensor decides whether you need a range extender. It needs AC power it will not get unplugged from. It should be out of sight and not by the front door, because the first thing an intruder does to a visible base station is attack it. And it should be near your router but not touching it — close enough for a solid connection, a foot or two away rather than stacked on top, where the two radios interfere.

A hallway shelf, a central landing or a closet with the door left ajar all work. A metal cabinet, a basement corner or behind a television do not: metal blocks the radio, and the bottom of the house is the worst place to be heard from.

Step three: the sensor alignment rule

This is the single most common cause of a system that false-alarms or silently fails to detect. A contact sensor is two parts — a sensor body and a magnet — and it reports open when the magnet moves out of range. Every maker publishes a maximum gap between the two halves, and the rules that follow from it are:

Mount both halves on the same plane, with the alignment marks facing each other, on the hinge-opposite side of the door or window so movement separates them immediately. Keep the gap comfortably inside the published maximum, because a door that swells in humidity will open the gap a few millimeters and a sensor set at its limit will start reporting the door as open on wet days. Clean the surface with alcohol before applying the adhesive and leave it an hour before testing — adhesive failures in the first week are nearly all surface preparation. And avoid metal frames where you can: a metal door or frame weakens the magnetic coupling, so you may need the magnet closer than the spec suggests.

One practical note for renters and anyone who may move the sensor later: the adhesive that holds a sensor reliably will often take matte paint with it. On painted drywall, consider a screwed mount or accept the repair. Best door and window sensors lists the published gap figures by model.

Step four: motion sensors go in choke points, not bedrooms

Two or three well-placed motion sensors do more security work than six badly placed ones. The right positions are the places an intruder cannot avoid: the ground-floor hallway, the top or bottom of the stairs, and the landing. Bedrooms are the wrong place — an intruder can skip a bedroom but cannot skip the route between floors.

Three placement rules. Mount at around seven to eight feet and aim across the room rather than down at the floor, which both widens the useful coverage and reduces pet triggers. Keep heat sources out of the field of view — radiators, warm-air vents, wood stoves, clothes dryers and any patch of floor that gets direct sun — because an infrared sensor detects heat change, not movement, and all of those look like something. And angle away from windows, where sunlight and headlights sweep across the detection pattern. Best motion sensors has the detection patterns, which decide whether a sensor suits a corridor or a room.

Step five: the keypad goes by the door you actually use

Not the front door — the door you come in through, which for most households is a side door, a back door or the one from the garage. A keypad at the wrong door means a disarm dash across the house every time, which is how people end up leaving the system disarmed permanently.

Mount it at a comfortable height, inside the protected area, and set the entry delay long enough to get to it with groceries in both hands — thirty to sixty seconds is typical. Then do the codes properly while you are there: a separate code for each household member and each regular visitor, named after the person rather than the role, and an administrator code that is not the same as anyone's everyday code.

Step six: check the range before you commit the far corner

Most kits include a range extender and most people leave it in the box. Before you glue anything in the furthest corner of the house, pair that sensor and walk it to its intended spot while watching the signal reading in the app. Detached garages, basements behind concrete, and rooms across more than two internal walls are the usual failures. If a sensor is marginal, the extender goes roughly halfway between it and the base station — not next to the sensor.

Step seven: test everything twice

Test mode first, armed second, because they catch different problems. In test or installation mode, open and close every door and window sensor and walk in front of every motion sensor, confirming each one registers. Then arm the system and trigger it for real, at least once: this is the only way to find out that the siren is quieter than you expected, that the entry delay is too short, that your phone notification arrives ninety seconds late, or that the keypad is in the wrong place. If you have monitoring, tell the monitoring center you are testing first.

Then test the failure modes, which is the step almost everyone skips. Unplug the base station and confirm the battery backup takes over and tells you. Unplug the router and confirm you still get an alert, if your system has cellular backup — and discover now rather than later if it does not. Do home security systems work without Wi-Fi covers what happens when the internet goes.

Step eight: the admin nobody mentions

Three pieces of paperwork turn a working install into a finished one. Check whether your municipality requires an alarm permit — many do, often before a monitoring company may request police dispatch, and some levy fines for repeated false alarms. Tell your home insurer: a monitored system sometimes affects a premium, and either way they generally want to know what protection exists. And write down who gets called, in order, with a verbal passcode — the monitoring center will ask, and the list is much easier to get right while you are sitting at the kitchen table than at 3am.

If you have not yet decided whether to pay for monitoring at all, do you need a monitoring plan and DIY vs monitored home security are the two pages that settle it. And once the alarm is in, the automations worth building on top of it are in smart home security automations.

What a DIY install cannot do

Two honest limits. A DIY wireless system does not protect glass that is broken without the window being opened unless you add a glass-break sensor, and most kits do not include one — a motion sensor in the room behind the window is the usual answer. And no DIY install replaces the physical basics: a Grade 1 deadbolt, lit approaches and windows that actually latch do more to prevent a break-in than any sensor, because an alarm reports an intrusion while a good lock prevents one. Wired vs wireless home security systems covers what you give up by choosing the DIY route in the first place.
The short answer

Quick picks

Tap any row for the full write-up.

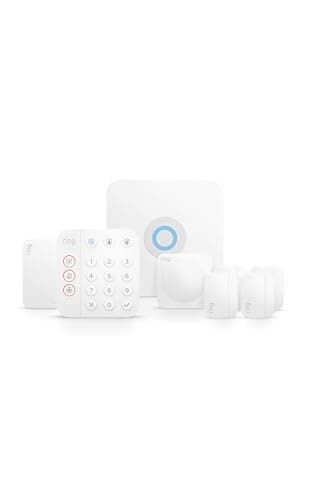
  • Ring Alarm 8-Piece Kit (2nd Gen)
    01 Ring Alarm 8-Piece Kit (2nd Gen)Top pick

    The easiest first DIY install and the easiest to get wrong cheaply, because the accessory catalogue is deep enough to fix any planning mistake for a few dollars. It self-monitors free, the optional professional monitoring is the cheapest no-contract option we track, and a range extender is in the box.

    Best for: A first DIY install, with room to add sensors you forgot · No Matter — Ring/Alexa app

    $249.99View on Amazon

    #ad · we may earn a commission from this link to Ring Alarm 8-Piece Kit (2nd Gen)

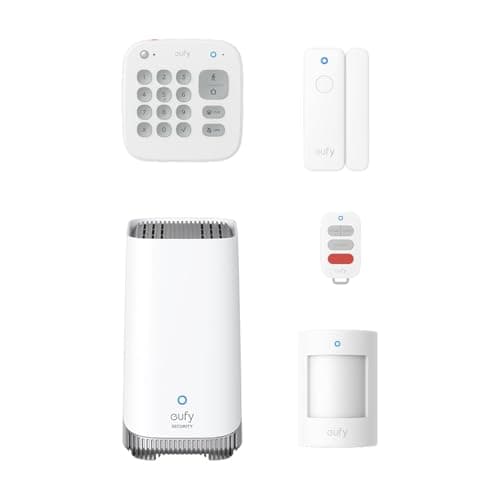
  • eufy Alarm 5-Piece Kit with HomeBase 3
    02 eufy Alarm 5-Piece Kit with HomeBase 3

    The quickest install on the page, because the five pieces arrive pre-configured — the DIY part really is sticking sensors up and keying a code. It also closes the monitoring question permanently: eufy sells no plan for it at any price, and the hub doubles as a local video recorder later.

    Best for: The fastest install, with the fee question closed for good · Alexa & Google; no HomeKit, no Matter

    $282.85View on Amazon

    $344.9518% off

    #ad · we may earn a commission from this link to eufy Alarm 5-Piece Kit with HomeBase 3

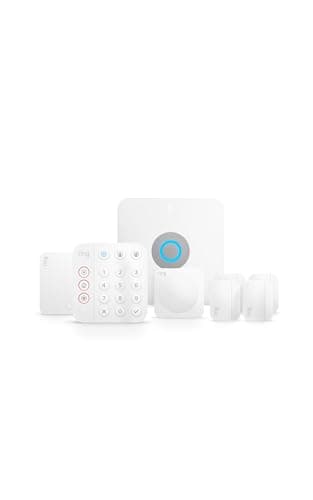
  • Ring Alarm Pro 8-Piece Kit
    03 Ring Alarm Pro 8-Piece Kit

    The same install as the standard Ring kit with one difference that changes where the base station goes: there is a full eero Wi-Fi 6 router inside it, so the brain of the alarm is also the brain of your network. Only worth it if you were replacing the router anyway.

    Best for: Anyone due a new router, who wants one box instead of two · No Matter — Ring/Alexa app

    $299.99View on Amazon

    #ad · we may earn a commission from this link to Ring Alarm Pro 8-Piece Kit

#ad · Live prices from the Amazon Product API, as of October 10, 2026. Where we have no verified live price we show none — we would rather leave a gap than print a number that has rotted.

DIY install order — what to decide at each step, and the mistake it prevents
DeviceWhat you decideRule of thumbMistake it prevents
1. Floor plan on paperWhich doors, windows and routes get a sensorPerimeter contacts, interior motion, camera only where you need identificationSensors spread evenly instead of covering real entry points
2. Base station positionCentral, powered, hidden, near the routerA foot or two from the router, not on top of it; never in a metal cabinetThe far bedroom sensor dropping off the radio
3. Contact sensorsWhich side, which plane, what gapHinge-opposite side, same plane, comfortably inside the published gapDoors reported open on humid days
4. Motion sensorsWhich rooms, what height, what directionChoke points at 7-8 ft, aimed across the room, no heat sources in viewFalse alarms from radiators, sun and pets
5. Keypad positionWhich door, what entry delayThe door you actually use; 30-60 seconds of delayA system left permanently disarmed
6. Range checkWhether the extender is needed, and whereWalk the sensor to its spot and read the signal before applying adhesiveA glued sensor that cannot reach the base
7. Test twice, then test failuresTest mode, then armed, then unplug power and routerTell the monitoring center before you trigger it for realDiscovering there is no cellular backup during a break-in
8. Permit, insurer, call listLocal alarm permit, insurer notification, contacts and passcodeCheck the permit requirement before monitoring is activatedFines, a void discount, and nobody reachable at 3am

In detail

The picks, in full

01

Ring Alarm 8-Piece Kit (2nd Gen)

Top pick
Ring Alarm 8-Piece Kit (2nd Gen)
$249.99View on Amazon

Price as of October 10, 2026. Amazon's price at checkout is the one that counts.

#ad · we may earn a commission from this link to Ring Alarm 8-Piece Kit (2nd Gen)

The easiest first DIY install and the easiest to get wrong cheaply, because the accessory catalogue is deep enough to fix any planning mistake for a few dollars. It self-monitors free, the optional professional monitoring is the cheapest no-contract option we track, and a range extender is in the box.

  • 8-piece DIY kit
  • Base station + keypad
  • Door/window + motion sensors
  • Range extender included
  • Optional 24/7 pro monitoring
  • Works with Alexa
Matter: No Matter — Ring/Alexa appFee: Free self-monitored; about $10/mo for 24/7 pro monitoringResearched, not hands-on tested

Good

  • The widest accessory catalogue in DIY security, which matters more on install day than any spec: the extra contact sensor for the window you forgot costs very little and pairs in a minute
  • A range extender is included, so the far corner of the house is solvable without a second purchase — and you can test the range before committing the adhesive
  • Free self-monitoring with app alerts and a siren means the system is complete on install day, and the decision about paying stays reversible in both directions

Less good

  • No Apple HomeKit and no Matter — you live in the Ring and Alexa apps
  • Cellular backup and saved video history only activate with a paid plan, so the unplug-the-router test will fail on the free tier
  • The base station is the siren, so siting it centrally and out of sight pulls against siting it where it can be heard from the street

Skip it if: you want no monthly fee to be structural rather than a choice you keep re-making — the eufy kit below has no plan to sell you at all.

02

eufy Alarm 5-Piece Kit with HomeBase 3

eufy Alarm 5-Piece Kit with HomeBase 3
$282.85View on Amazon

$344.9518% off

Price as of October 10, 2026. Amazon's price at checkout is the one that counts.

#ad · we may earn a commission from this link to eufy Alarm 5-Piece Kit with HomeBase 3

The quickest install on the page, because the five pieces arrive pre-configured — the DIY part really is sticking sensors up and keying a code. It also closes the monitoring question permanently: eufy sells no plan for it at any price, and the hub doubles as a local video recorder later.

  • HomeBase 3 + keypad + motion + 2 entry sensors
  • 100dB siren built into the hub
  • Local storage expandable to 16TB
  • Grows to 16 eufy cameras + 34 sensors
  • DIY installation, pre-configured
  • No subscription offered at all
Matter: Alexa & Google; no HomeKit, no MatterFee: None — eufy sells no monitoring plan for this systemResearched, not hands-on tested

Good

  • Pre-configured out of the box means no pairing marathon — on a two-hour install, the pairing is usually the hour that overruns
  • The hub is also a recorder: local storage expandable to 16TB on a 2.5-inch drive, so a kit bought as an alarm becomes a no-fee camera system later without a second brain in the house
  • It scales much further than the five pieces suggest — up to 16 eufy cameras or doorbells and 34 sensors — so the install you do today is not the ceiling

Less good

  • There is no professional monitoring tier to add, ever, so if you later want a center that can dispatch police you are replacing the system rather than upgrading a plan
  • No cellular backup, so the unplug-the-router test leaves you with a loud siren and no notification
  • Five pieces is a small kit for a house with several ground-floor entry points — plan the sensor count from your floor plan, not from the box

Skip it if: there is any chance you will want 24/7 professional monitoring — eufy does not sell it for this system, so the Ring kit is the one that keeps that option alive.

03

Ring Alarm Pro 8-Piece Kit

Ring Alarm Pro 8-Piece Kit
$299.99View on Amazon

Price as of October 10, 2026. Amazon's price at checkout is the one that counts.

#ad · we may earn a commission from this link to Ring Alarm Pro 8-Piece Kit

The same install as the standard Ring kit with one difference that changes where the base station goes: there is a full eero Wi-Fi 6 router inside it, so the brain of the alarm is also the brain of your network. Only worth it if you were replacing the router anyway.

  • 8-piece kit: Pro base, keypad, 4 contact sensors, motion detector, range extender
  • Built-in eero Wi-Fi 6 router
  • Local video storage via Ring Edge (with plan)
  • Internet + cellular backup (with plan)
  • Optional 24/7 pro monitoring
  • Works with Alexa
Matter: No Matter — Ring/Alexa appFee: Free self-monitored; about $10/mo for 24/7 pro monitoringResearched, not hands-on tested

Good

  • It removes the base-station-near-the-router problem entirely, because it is the router — one central position, one power socket, no radio interference between two stacked boxes
  • With a plan it adds backup internet, so the system stays online when broadband drops, which is the single biggest weakness of every DIY alarm
  • It can keep Ring camera video local on the base station with Ring Edge, which is the only route to local video storage in the Ring ecosystem

Less good

  • The router-plus-alarm value only lands if you were going to replace your router anyway — otherwise you are paying for hardware you do not need
  • The headline local-video and backup-internet features are gated behind a paid Ring plan
  • Because it is now your router, the central-and-hidden placement advice fights with needing good Wi-Fi coverage — plan the position for the network first

Skip it if: you're happy with your current router — the Pro's whole reason to exist is the built-in eero, so without that you're paying for hardware you don't need. Get the standard Ring Alarm kit instead.

How we chose

We don't run a test lab

We don't wire every one of these into a test rig, and we won't write "in our testing" as if we do. What we did instead: pulled each product's published specifications, confirmed its Matter/Thread/HomeKit support from the manufacturer's own documentation, added up the real 3-year cost with any monthly fee included, and read the aggregated verified-buyer sentiment. Every pick is chosen against that published method. Where a number came from someone else, we name and link them in Sources.

Questions

Frequently asked

How long does it take to install a DIY home security system?
About two hours for a typical kit, of which maybe forty minutes is physical work. Pairing and placement take the rest, and planning the layout on paper first is what keeps it to two hours rather than four — every sensor you reposition after the adhesive has set costs you time and usually leaves a mark. Pre-configured kits, where the sensors arrive already paired to the hub, are noticeably quicker.
What tools do I need to install a home security system?
A screwdriver, a tape measure, a pencil and some isopropyl alcohol or surface wipes. Most modern kits are adhesive-mounted with screws supplied as an option, so no drilling is required unless you choose it. The alcohol matters more than it sounds: most adhesive failures in the first week are down to a dusty or greasy surface rather than a weak pad.
Where should the base station go?
Somewhere central, AC-powered, out of sight, and a foot or two from your router rather than stacked on it. Central because every sensor talks to it directly and the furthest sensor decides whether you need the range extender. Out of sight because it is the siren and the brain, and a visible base station by the front door is the first thing an intruder attacks. Avoid metal cabinets and basements — one blocks the radio, the other muffles the siren.
Which windows need a sensor?
Every window a person could realistically get through from a surface they can stand on. That means all ground-floor windows, plus anything above a flat roof, a garage roof, a substantial fence or an extension — upper-floor windows people assume are safe are a common entry route. Where a window is awkward or expensive to cover, a motion sensor in the room behind it does much of the same job and also catches glass broken without the window being opened.
Do I need a permit for a home security system?
Possibly — many municipalities require an alarm permit, often before a monitoring company may request police dispatch, and some levy fines for repeated false alarms. Requirements and costs vary widely by city and county, so check your local rules before you activate monitoring rather than after. It is also worth telling your home insurer what you have installed, since a monitored system can affect a premium and they generally want it on record either way.
How do I test the system properly?
Three passes. In test or installation mode, trigger every sensor and confirm each registers. Then arm the system and set it off for real at least once — that is the only way to learn that the siren is quieter than expected, the entry delay is too short or your notification arrives late. Then test the failure modes: unplug the base station to confirm battery backup works and reports itself, and unplug the router to see whether you still get an alert. If you have monitoring, tell the center before you start.

Keep reading

Receipts

Sources

We do not run a test lab, and we do not pretend to. Compatibility and subscription-cost claims come from the manufacturer's own documentation and the live retailer listing, read on the dates shown. Read our full method.